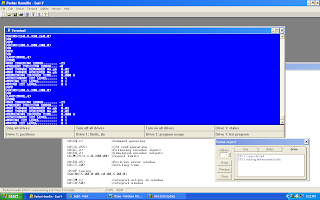
These VIX-IH drives, on the other hand, pose a challenge. The VIX-IH User Manual is over two hundred pages long and nearly half of that describes the custom "EASI-V" programming language used to configure the drives. These drives have multiple input and output pins, several encoder interfaces, and can be configured in numerous different ways.
I can take several approaches to configuring these drives. The simplest option is to configure my servos as perfect drop-in replacements for the existing stepper drives. This would make setting up and configuring the printer very easy, but sacrifice some of the additional features servos provide.
The other option would be to produce a very complex program that makes use of all the feedback a servo provides. Unfortunately many of these features are not supported by standard 3d printer controllers and would require extensive firmware modification.
In the end I chose a middle ground and enabled as many servo features as possible while maintaining compatibility with standard firmwares.
The body of the program looks like this. The INIT routine does basic drive configuration, and the START routine calls FOLLOW which tells the drive to "follow" the step/direction pulses it is receiving. This program is sufficient to get the servos moving, but provides no other features.
1INIT:
1W(EI,0) ;Configure Step/Dir input
1LIMITS(0,1,0,1000.0) ;Configure limits
1HOME1(+,0,-3.00,100.0,4) ;Configure Homing Routine
;Configure Servo Gains
1GAINS(50.0,50.0,150.0,60.0,0)
;Configure Motor Parameters
1MOTOR(49416,1.6,26000,6923,80,4.75,1.8,4.5)
1END
1START:
1ON ;Turn Motor On
1FOLLOW1(E,1,1000) ;Enable Step/Dir Input
1END
The first servo-specific feature I want to use is the highly precise encoder homing routine. Normal 3d printers use regular switches for their homing and limit behavior, but my servos have a special Z encoder channel that is much more repeatable.
Standard 3d printer firmwares do not support this feature, so I instead programmed the VIX-IH drive to perform the homing routine when one of its input pins is brought high. The modified START routine looks like this:
1START:
1ON ;Turn Motor On
1FOLLOW1(E,1,1000) ;Enable Step/Dir Input
1TR(AI,>,100) ;Wait for homing signal to go high
1FOLLOW0(E,1,1000) ;Disable Step/Dir Input
1GH ;Perform Homing Routine
1TR(AI,<,100) ;Wait for homing signal to go low
1GOTO(START) ;Return to 'START'
1END
Another benefit of a fully featured servo is that it monitors the state of the motor. People sometimes assume that this means a servo can overcome or correct faults but that is not true. A fault can only be detected after it occurs, so if you resume normal operation the print will still contain whatever defect which caused a fault in the first place.
Fault detection should only be used to terminate the print. This avoids wasting plastic, and can prevent the more serious failures that might occur if you attempt to continue a failed print. Here is the list of faults the VIX-IH drives can detect:
Typical 3d printer firmwares do not have support for fault detection so I configured both the Fault and Limit conditions to share to the same pin. We want to stop the print in both situations, so having the fault output act like a limit switch is convenient.
This final configuration only uses pins from the X4 connector which will making wiring simple.
You can view the complete programs here: MX80L, ATS125


No comments:
Post a Comment