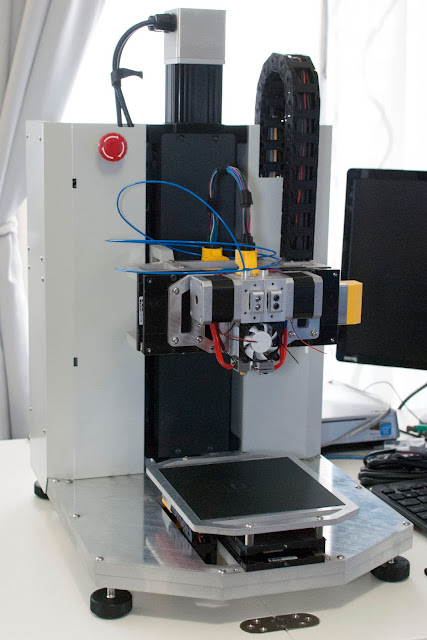
I'd like to clean up the printer a bit before working on the extruders, so I decided to install the side panels. The side panels serve several functional purposes but still look very clean from the front, and I'm quite happy with how they turned out.
The power supplies fold upwards to mount vertically to the side panel. I might clean up the wire routing a bit more, but it seems alright as-is.
The internal and external sheet metal panels are independently mounted to the Z axis via small aluminum spacers. The small spacers are very annoying to handle, but this design allows the external panel to slide into place after the rest of the printer has been fully assembled.
The external panel is offset by 2mm to provide a gap around the Z axis stage, which allows the Z axis to move up and down without scraping the sheet metal. The gap will also allow cool air to escape around the Z axis stage, as the enclosure will be slightly pressurized by intake fans when fully assembled.
I also slid the right side panel into place, but did not fully install all the fasteners in case any changes need to be made in the future.
You might also notice two rectangular slots in each of the side panels. They will eventually be used to mount a detachable heated enclosure.
As I noted in some of the earlier posts, one of the primary objectives of this design was to keep the printer compact despite its complexity.
Making a project as compact as possible is always a bit of a puzzle. Eventually the design becomes impractical to assemble and repair, and its not always obvious where the limit lies when the design is still in CAD.
I'm probably on the margin with this printer. Everything fits, but performing a serious repair would be extremely painful.


No comments:
Post a Comment