At this point I could immediately install the electronics on the mill, but I would prefer to do a complete configuration and test on the bench first. Caution is particularly warranted when working on a machine powerful to harm itself, as improper configuration can cause real damage.
I will be running the mill from an old laptop for the sake of convenience. This is unconventional but doesn't have any major drawbacks. I began by installing a clean copy of windows along with new installs of Mach4 and the PoKeys plugin.
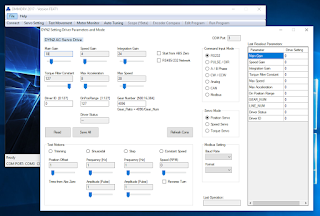
Before diving into the Mach4 configuration, I decided to double check the servo drive settings. The servo drives can communicate with a computer over USB and have a small configuration program which lets you monitor and adjust their settings.
In their default state, the servos have a staggering 16,384 steps per revolution. As the servos drive their respective axes through both belt and screw reduction, one step will only result in roughly 0.1 microns of motion which is much too fine to be practical.
I reconfigured the servos to a more reasonable 2000 steps per revolution, and also made some changes to when the servo will report a fault.
The PoKeys can be connected via USB or Ethernet. USB is convenient, but has more latency than an Ethernet connection so it should be avoided if possible.
You must configure a static IP for the host computer in order to allow a direct Ethernet connection between the computer and the control board. This is given only a brief mention in the PoKeys manual, but the board won't work if you miss this step.
With basic setup out of the way, its finally time to start up Mach4. I was immediately prompted to configure the PoKeys controller.
The wizard has an automatic configuration tool, but I would rather do the configuration manually to see what options are available.
The PoKeys Control board is the low-level interface between the computer and the hardware, so its configuration mostly deals with io pin assignments.
The first, and arguably most important configuration page is the pulse engine setup. Here is where you enter which pins are connected to servo drives, and invert any signals if necessary. As you can see, all three axes are connected to their default dedicated pins.
An analogue spindle output needs to be enabled on the Miscellaneous tab. My spindle is connected to pin 17 so that is what I select in the drop down box.
The higher level milling machine configuration is done in Mach4. Mach4 configuration starts with basic unit and mode selections. Although I do my CAD work almost exclusively in metric units, I have a better intuitive feel for the imperial system and prefer to configure machines in inches.
The next important tab is the Motor configuration which is where I enter the steps/inch for each axis. This number can be calculated by multiplying the ratios of the various components.
1 / (Servo Ratio * Pulley Ratio * Screw Pitch) =
1 / ((0.25/500) * (18/56) * (5/25.4)) = 31608.88 Steps/Inch
The Axis Mapping pages confirms that the numbered motor axes correspond to the correct Cartesian axes.
I will eventually need to configure the homing settings, but that will have to wait until the electronics are connected to the mill.
The input signals were automatically set up by the PoKeys plugin and required no changes.
I did, however, manually configure some additional output signals to control the spindle and relays.
This entire process is really quite similar to setting up a 3d printer. It might even be easier since configuration is done through an interface instead of by editing text files.
Since the electronics are now ready for the mill, I quickly finished grounding the cable shields by wrapping them in copper braid. This is a bit sloppy but I don't have anything more appropriate at the moment.
I used a similar process for the signal shields.
Finally I bagged and packed the entire system so it will be ready to bring to the workshop.


No comments:
Post a Comment